
Data Connector - How to Connect to Ceridian Dayforce
Overview
RedFlag’s Data Connector Integration allows you to seamlessly sync recipient profile data from Ceridian Dayforce into RedFlag—eliminating the need for manual uploads.
Once Dayforce is connected, you can map incoming fields to RedFlag profile fields. Data will sync automatically, keeping your recipient list up to date.
🛡️ Note: This feature must be enabled by RedFlag on the backend before configuration is available in your account.
Requirements for Dayforce Connection
- Create Password Policy
- Configure Roles
- Configure Field-Level Access
- Enable Employee XRefCode
- Set Up Integration User and Assign Role
- Define Location Access
- Configure Ceridian Dayforce in RedFlag’s Data Connector
Create Password Policy
Create a password policy specific to this integration. Ensure there is no password expiration or reset—a password change will interrupt integration access.
Name the policy clearly (e.g., RedFlag Integration Policy).
Configure Roles
Create a role for RedFlag integration.
- Go to System Admin → Roles → Add.
- Name the role (e.g., RedFlag Integration Role).
- Set the Password Policy to the one created in the previous step.
- Under Features, enable:
- HCM Anywhere
- Web Services
- Explorer
- Patch/Post Employee HR Data
- Read Data
🛡️ Note: If you need write functionality (such as POST or PATCH for time-off requests), also enable Web Services Patch/Post Employee Time Off.
Configure Field-Level Access
In the Authorizations tab, ensure “Can Read” permission is granted for these entities:
- Employee Contact Information (Business and Personal)
- Employee Number
- Employee Personal Information
- Employee Properties
- Employee Status Information
- Employee Work Assignment (Primary and Secondary Records)
- User Information
- Employee Personal Information XrefCode
Enable Employee XRefCode
In Web Services Field-Level Access, expand RESTful and SOAP sections to enable:
RESTful → Employee:
- CommonName
- Contacts
- DisplayName
- EmployeeManager
- EmployeeNumber
- EmployeeOrgUnits
- EmployeeStatus
- EmployeeWorkAssignment
- EmploymentStatus
- EmploymentType
- FirstName
- HireDate
- HomeOrganization
- LastName
- OriginalHireDate
- SeniorityDate
- StartDate
- XRefCode
SOAP → GetEmployeeXRefCodesResponse:
- XRefCode
Set Up Integration User and Assign Role
- Navigate to System Admin → Users → New.
- Enter a username (e.g., RedFlagIntegrationUser).
- Set Culture and Numeric Culture to English (US).
- Create and save a password (keep it for setup).
- Check Approved, and assign the role created earlier.
Define Location Access
In the Location Access tab:
- Select at least the top-level organizational location.
- Optionally, include additional locations.
- Mark one as Primary.
- Click Save to finalize.
Configure Ceridian Dayforce in RedFlag’s Data Connector
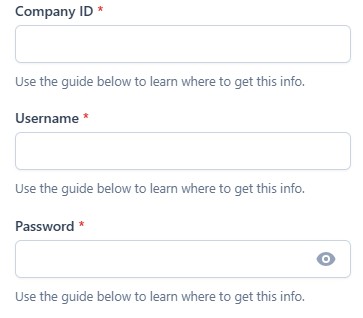
- Gather your Username, Password, and Company ID (found on your login page).
- Enter the credentials into RedFlag’s Data Connector.
- Click Save, then select Authorize to complete setup.
Your Ceridian Dayforce account is now connected 🎉 After connecting, complete configuration to start importing your data.