
Data Connector Integration
Overview
RedFlag’s Data Connector Integration allows you to seamlessly sync recipient profile data from supported HRIS systems into RedFlag—eliminating the need for manual uploads.
Once your HRIS system is connected, you can map incoming fields to RedFlag profile fields. Data will sync automatically, keeping your recipient list up to date.
🛡️ Note: This feature must be enabled by RedFlag on the backend before configuration is available in your account.
Setup & Configuration
Connect Your HRIS System
To authorize a connection:
- Go to More > Integrations > Data Connector.
- Click Setup Connection.
- Select your HRIS system (e.g., BambooHR, Dayforce, Workday).
- Log in or enter your HRIS credentials.
✅ If the connection is successful, the status will display as Connected.
❌ If credentials are invalid, the status will display as Unauthorized.
🛡️ Note: If your HRIS system is not listed, contact the Customer Success Team for support options.
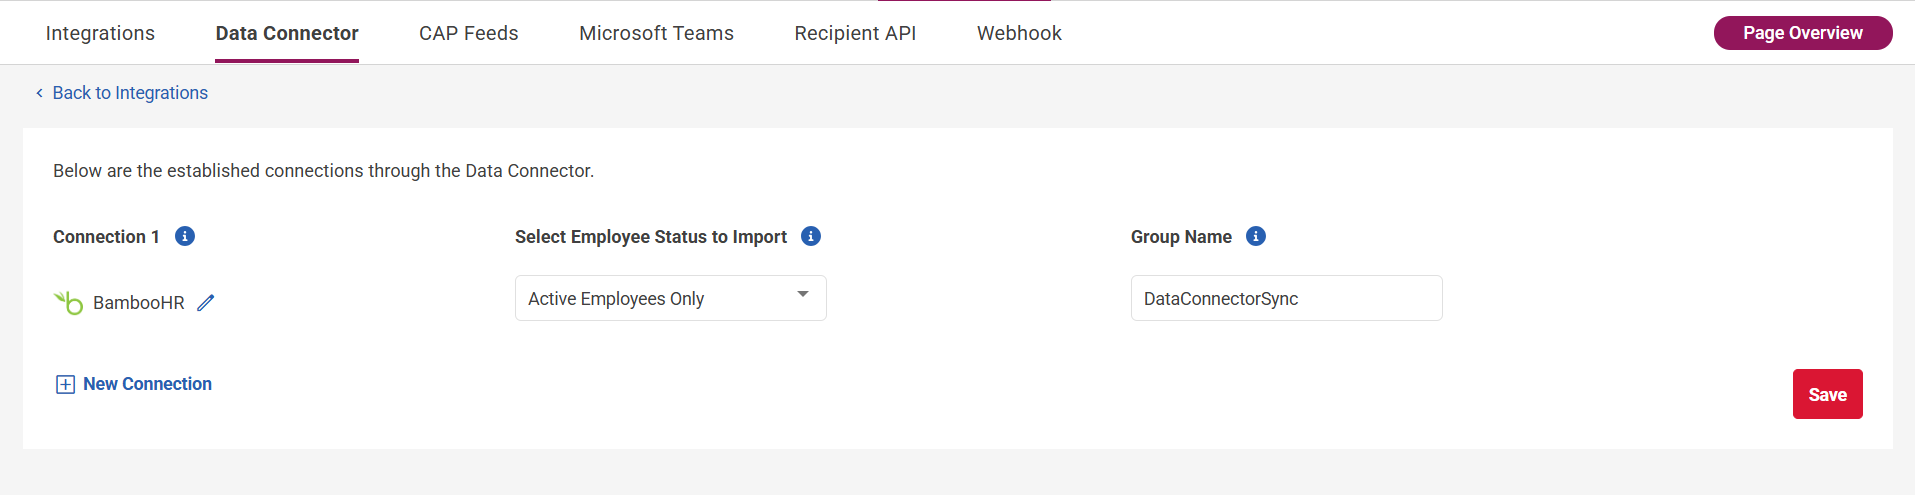
Select Employee Status to Import
Choose which employees to sync:
- Active Employees Only – imports only employees marked as Active.
- Active and Inactive Employees – imports all except those marked as Terminated, Retired, or Deceased.
Set a Group Name
Enter a Group Name where all imported recipients will be placed. This group will:
- Appear on the Groups page.
- Be available for targeting in messages.
- Be assignable to Editors.
- Be automatically updated with synced recipients.
🛡️ Note: This group is protected and cannot be modified or deleted from the Groups page. The name must be unique but can be updated later from the setup screen.
Click Save to finalize the connection.
Adding Additional Connections
To import data from multiple companies into one RedFlag location:
- After creating the first connection, click Add New Connection.
- Select the additional HRIS provider.
- Complete the connection steps:
- Authorize access
- Select employee type
- Set a new group name
- Click Save
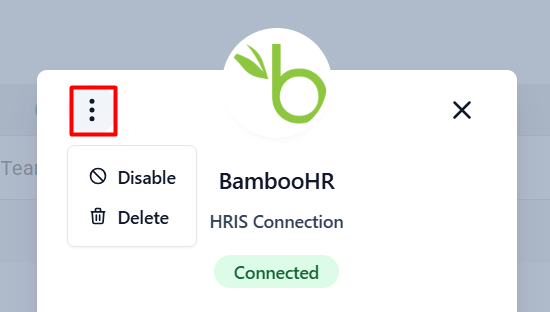
Managing Connections
- Edit a Connection: Click the edit icon next to the connected provider. Make changes and save.
- Disable a Connection: Click the edit icon, then the three-dot menu > Disable.
- Delete a Connection: Click the edit icon, then the three-dot menu > Delete.
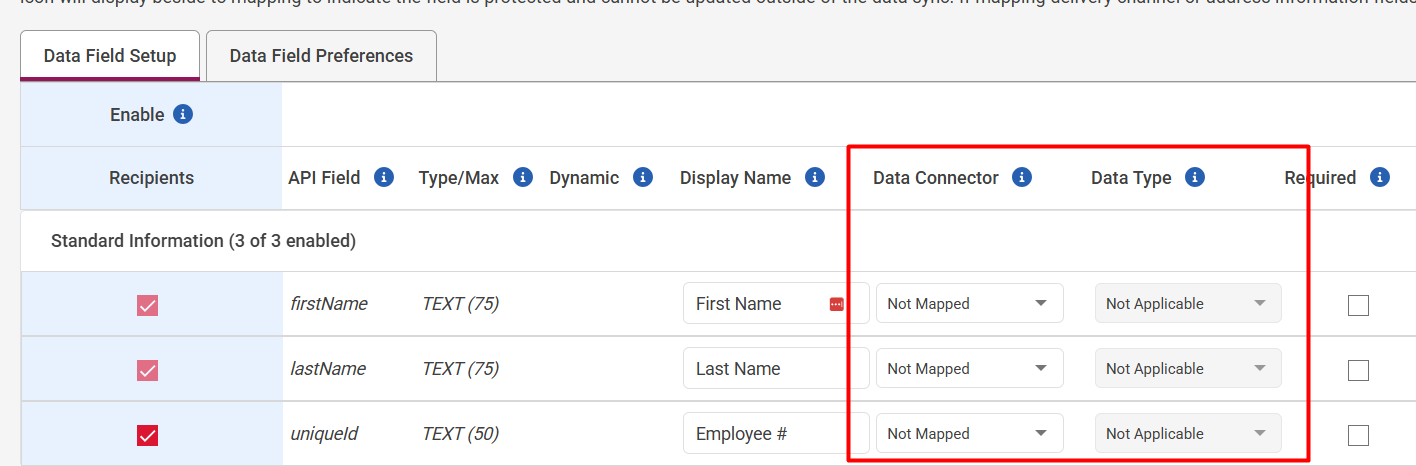
Mapping Fields to RedFlag
To ensure proper data syncing, you must map incoming HRIS fields to RedFlag fields.
Steps to Map Fields
- Go to More > Setup > Profile Data Field Setup.
- Enable the data fields you want to use.
- Under the Data Connector column, select the appropriate HRIS field from the dropdown.
🔑 Required: The Unique ID field in RedFlag must be mapped to either Id or Employee Number to import recipients.
🔒 Once a field is mapped, a padlock icon will display. This means it is locked and cannot be manually edited outside the sync.
Delivery Channel Data Types
If mapping phone/email fields, a Data Type must be selected:
- Primary
- Secondary
- Home
- Work
- Office
- Mobile
- Assistant
- Fax
- Direct Dial-In
- Personal
- Other
Address Information Data Types
If mapping address information fields, a Data Type must be selected:
- Primary
- Secondary
- Home
- Office
- Shipping
- Billing
- Other
Field Mapping Tips
- Unmapped Fields: If a field should exist in RedFlag but not sync from the Data Connector, leave it set to Not Mapped.
- Flexible vs. Specific Fields: RedFlag supports 33 data fields. Use flexible fields for general info (e.g., department) and specific fields for addresses, phone numbers, and delivery channels.
Manual Sync & Status
RedFlag sync behavior depends on your HRIS provider and how it delivers data through our Data Connector.
How Syncing Works
Some HRIS systems support real-time webhooks.
When a change is made in your HRIS (new hire, termination, update, etc.), Apideck receives a real-time webhook event and immediately passes the update to RedFlag.
Other HRIS systems use what are called “virtual webhooks.”
With virtual webhooks, the provider checks for changes on a scheduled interval (typically every 24 hours) and then sends change events in batches.
🛡️ Note: Sync frequency depends entirely on the capabilities of your HRIS provider.
Manual Sync
If you need to trigger a sync outside of the scheduled timeframe (for example, to pull in recent changes immediately), you can manually initiate one:
- Go to More > Integrations.
- Click the Manual Sync icon in the far-right column.
The sync will start immediately and complete within a few moments.

Questions?
If you have any questions about how the feature works, whether it’s the right fit for your organization, or if you’d like access to the feature, feel free to reach out to our Customer Success Team.