
Microsoft Entra ID SAML SSO Configuration
📍 This setup takes place in the Microsoft Entra admin center, under Enterprise Applications > [Your RedFlag App] > Single sign-on.
Overview
This article walks through creating a SAML-based enterprise application in Microsoft Entra ID so your organization's users can log in to RedFlag using single sign-on (SSO). Once the app is configured here, use the values it generates to complete the RedFlag side of setup — see SAML SSO Configuration.
🛡️ Note: Two values in this guide — the Sign on URL and the tenant ID — are unique to your RedFlag account and are not filled in below.
Create App Roles
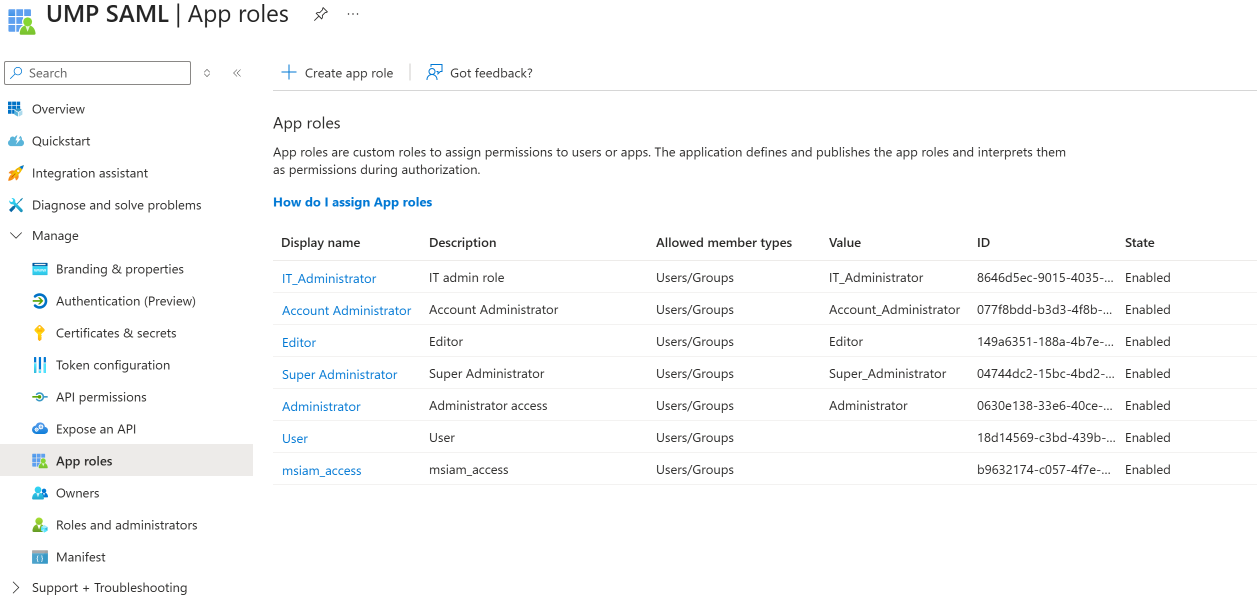
Before configuring SAML, define the app roles that map to RedFlag user roles. These are sent to RedFlag in the SAML role claim and determine each user's permission level once they log in.
📍 To access, go to: Enterprise Applications > [Your App] > App roles > Create app role
Create the following app roles, with Allowed member types set to Users/Groups and State set to Enabled:
Display Name | Value | Maps to RedFlag Role |
|---|---|---|
IT_Administrator | IT_Administrator | IT Admin |
Account Administrator | Account_Administrator | Account Admin |
Super Administrator | Super_Administrator | Super Admin |
Administrator | Administrator | Admin |
Editor | Editor | Editor |
🛡️ Note: msiam_access is a default role Microsoft Entra creates automatically. Leave it as-is — it doesn't need a value and isn't assigned to RedFlag users.
Configure Basic SAML Configuration
📍 To access, go to: Enterprise Applications > [Your App] > Single sign-on > SAML
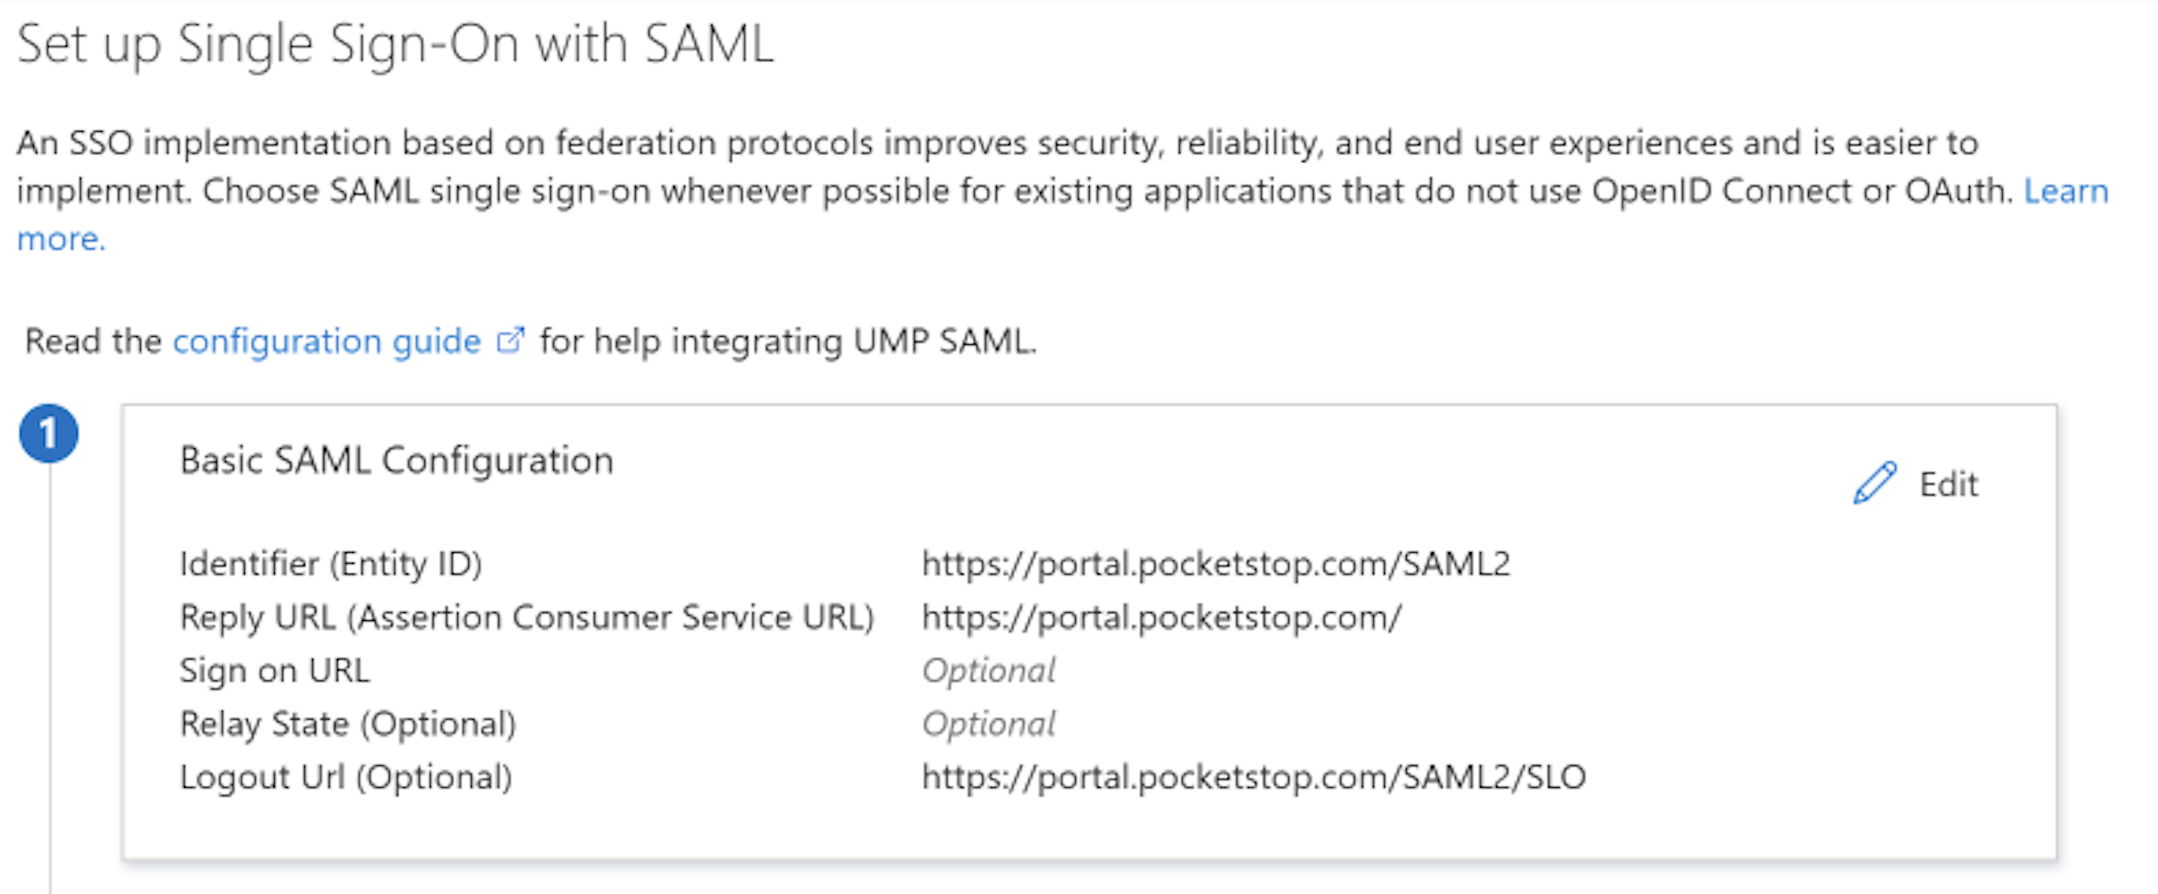
Under Basic SAML Configuration, enter:
Field | Value |
|---|---|
Identifier (Entity ID) | |
Reply URL (Assertion Consumer Service URL) | |
Sign on URL | (provided by RedFlag) |
Relay State (Optional) | Leave blank |
Logout Url (Optional) |
Configure Attributes & Claims
📍 To access, go to: Single sign-on > SAML > Attributes & Claims > Edit
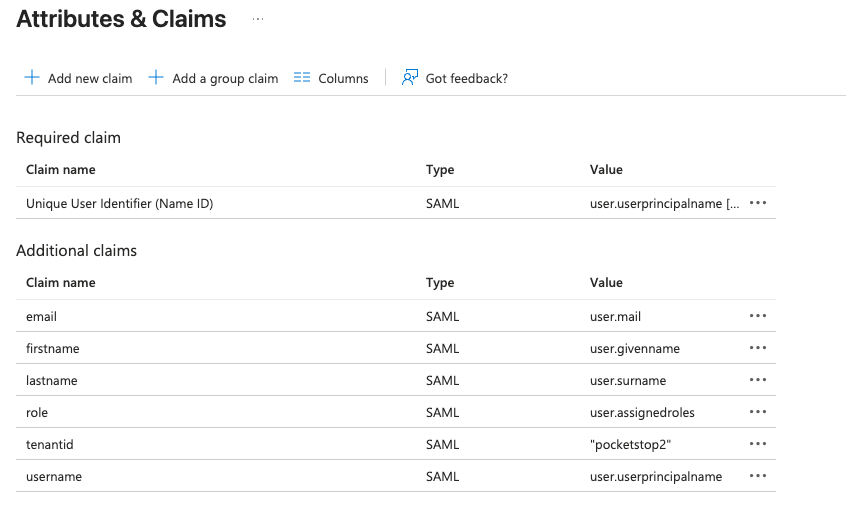
All of the claims below are required for RedFlag to authenticate and provision users correctly.
Claim Name | Value |
|---|---|
Unique User Identifier (Name ID) |
|
| |
firstname |
|
lastname |
|
role |
|
tenantid |
(replace with the tenant ID provided by RedFlag) |
username |
|
🛡️ Note: tenantid is a fixed text string, not a directory attribute. Enter the tenant ID provided by RedFlag without quotes — Entra will add the quotes automatically.
Assign Users and Groups
Assign the users or groups who need RedFlag access to this app, and give each one the app role created in Step 1 that matches the RedFlag permission level they should have.
Next Steps
Once the app is configured, users can log in to RedFlag by going to the unique sign-on URL provided by RedFlag.